Checkout
The ClarusPOS checkout terminal is the main selling interface — a full-screen view where you add products, apply discounts, select payment methods, and complete sales in seconds.
Opening a Session First
You must open a cashier session before you can access the terminal. See Multi-Location for details. If you navigate to Checkout without an open session, you are redirected to the session open form automatically.
Processing a Sale
Open the POS dashboard
Navigate to ClarusPOS in the sidebar. The dashboard shows your active session, recent sales, and quick-access actions.
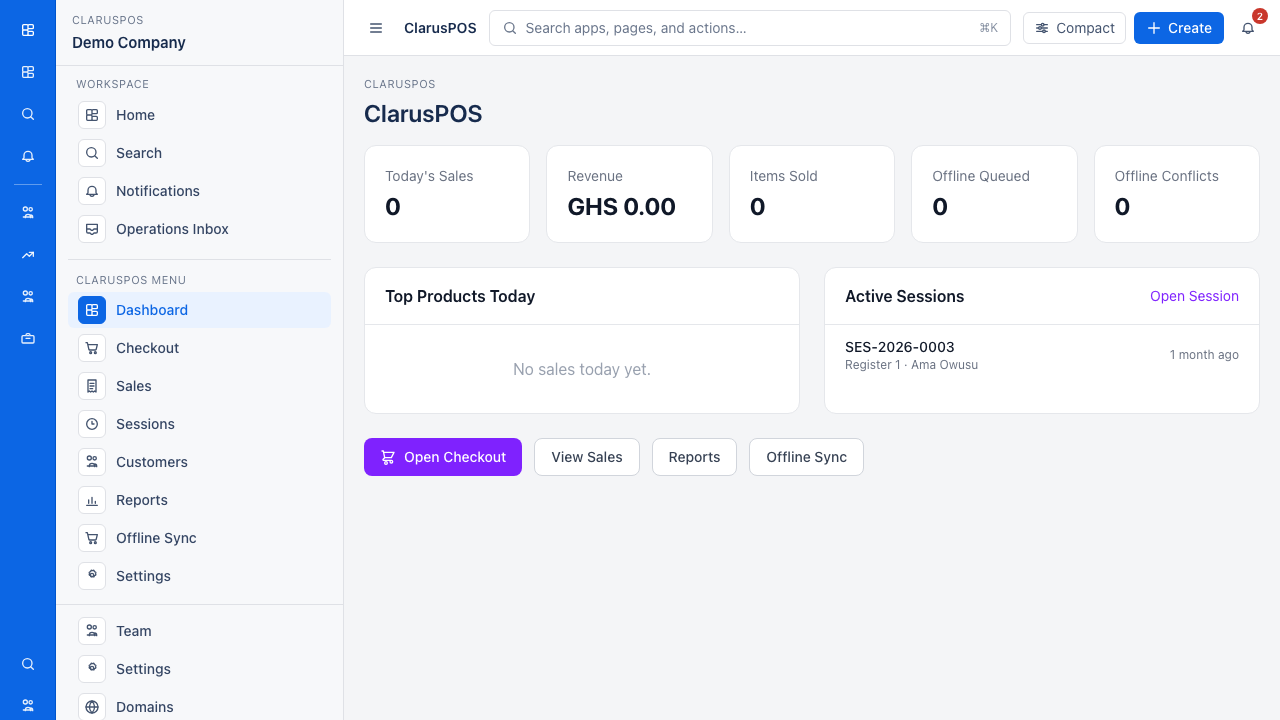
Use the checkout terminal
Go to ClarusPOS → Checkout. Search or browse products, build your cart, and process payment to complete the sale.
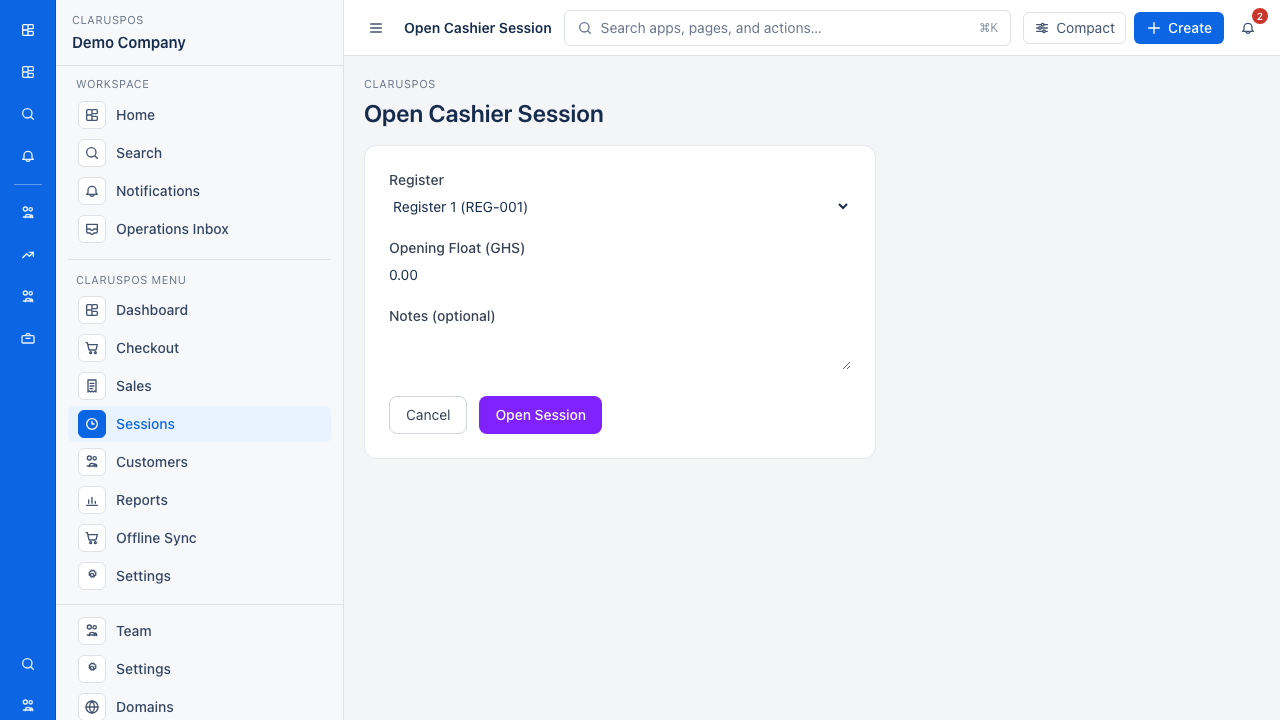
Using the Terminal
- Go to ClarusPOS → Checkout.
- The terminal loads with your active session and product catalogue.
- Search or browse for products and click to add them to the cart.
- Adjust quantities directly in the cart.
- Optionally attach a Customer from your POS customer list.
- Optionally apply a Discount — fixed amount or percentage — at the cart level.
- Add Notes if needed.
Processing Payment
- Click Charge (or equivalent proceed button) when the cart is ready.
- Select one or more Payment Methods:
- Cash — enter the amount tendered; change due is calculated automatically
- Card
- Mobile Money
- Bank Transfer
- Other
- For split payments, add multiple payment lines that together cover the total.
- Click Complete Sale.
The sale is recorded, stock levels update in the session's linked warehouse, and you are taken to the sale receipt page.
Receipts
After completing a sale you can view and print the receipt. To view a receipt for an older sale, go to ClarusPOS → Sales and open the sale, then click Receipt.
Holding a Cart
If you need to pause a transaction:
- Click Hold Cart.
- Optionally enter a Label to identify the cart (e.g., "Table 3").
- The cart saves under your session.
To restore a held cart, open the Held Carts panel on the terminal and select the cart you want to resume. The held cart is deleted once restored.
Refunds and Voids
From the Sales list or a sale detail page:
- Refund — reverses a completed sale; stock quantities are restored to the warehouse automatically
- Void — performs the same stock reversal as a refund, then sets the sale status to
voidedto distinguish intentionally cancelled transactions from standard refunds
Only completed sales can be refunded or voided.
You can generate a formal Paxus invoice from any completed POS sale by opening the sale and clicking Generate Invoice. This is useful when a client needs a VAT invoice for a walk-in purchase. A sale can only have one invoice generated — the action is disabled if one already exists.
See Multi-Location to set up registers and open a cashier session before using the terminal, and Analytics & Reports to review completed sales.